LinkWithin

Related Posts Plugin for WordPress, Blogger...
Showing posts with label waves. Show all posts

Tuesday, 10 December 2013

Hair Personality with Toni & Guy | The 'Jumbo Tong'

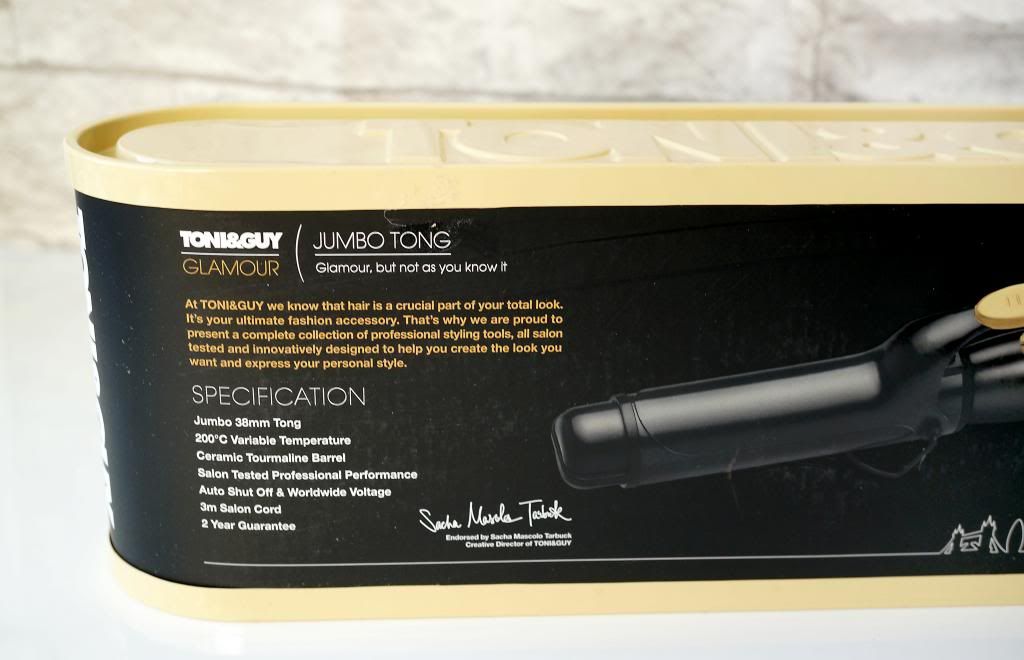
Toni & Guy | The Jumbo Tong | £20.00* | Link

When I was asked to take part in Toni & Guy's 'What's Your Hair Personality?' challenge, I jumped at the chance.  If you've been reading my blog for a while, you'll know that I have an obsession for anything hair related.  Every blogger has a 'thing', don't they? Whether it be skin care, nail polish or an ever-growing lip balm collection at the bottom of their handbags. Mine is most certainly anything to do with the ol' barnet! Toni & Guy do a fabulous selection of products and hot tools, all matched to certain hair personality's and types.  There are 4 core collections - 'Classic', 'Casual', 'Creative' and 'Glamorous' - something to suit every preference.  I had a little browse through but there was one collection that caught my eye straight away - 'Glamour'.   I'm always curling my hair (it's naturally straight) and I'm a big fan of volume - the bigger the better. You'll never catch me getting ready for a night out without a few rollers delicately perched on my head! Enter the Toni & Guy 'Jumbo Tong' - meant for creating lots of volume, glamorous waves and sleek loose curls.  

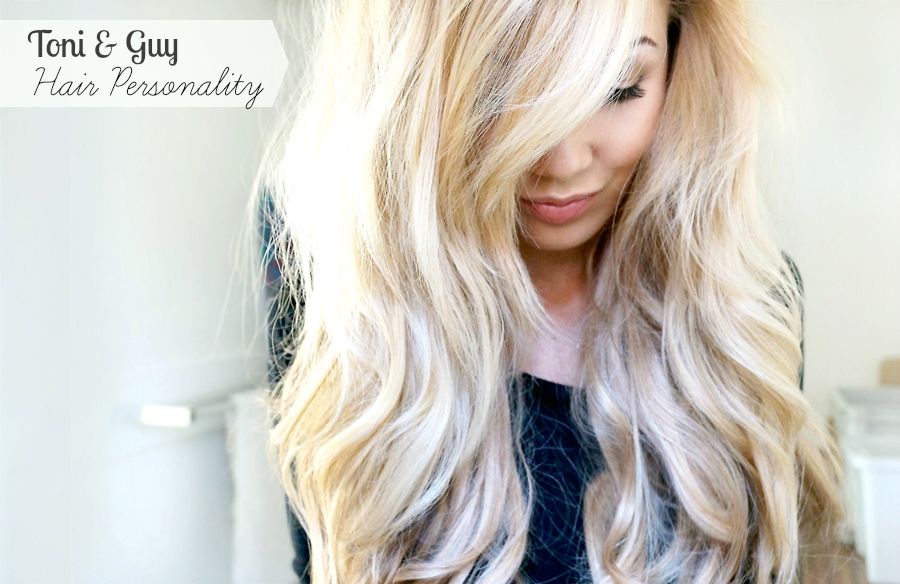
The large barrel (38mm to be precise) is perfect for creating waves and large, loose curls in the hair.  A lot of curling tongs and wands on the market tend to give that 'ringlet' look - but this one adds just the right amount of curl without looking over-done, and provides the hair with a lot of movement and texture in an instant.  To create the look above,  I simply took one inch sections and wrapped them around the barrel for a few seconds before releasing.  I then 'perfected' the look after I'd gone around my whole head and re-curled some of the bits that looked a little bit flat - sometimes taking slightly smaller sections of hair to get a variety of slightly tighter curls and loose waves.  The movement and texture that is achieved is simply stunning - very similar to the look I'd get when using heated rollers or when I have 'second day curls' - very undone, a little tousled and with a lot of body in the mid-sections.   The curls do drop throughout the day, so if you're the type who likes your hair to stay put I'd recommend using a good hairspray, but I was left with lovely, loose looking waves - very beachy and bed-heady. I will say that the tongs work much better on 'second day hair' - I achieved a more defined wave when my hair wasn't freshly washed but I guess that's the case with the majority of heated tools.

The Jumbo Tong is extremely easy and straight forward to use.   You simply choose the heat setting depending on your hair type/thickness via the dial on the body of the tong (I use a medium heat) and in a minute or so you're pretty much ready to get styling! If you have hair that tends to struggle to hold a curl, you might need to have a play around with the dial to find a setting that works for you, but It's very quick to use and a complete doddle to get around your whole head in a matter of minutes - leaving you with perfectly 'undone' looking hair to rival the likes of Cheryl Cole.  The best part is the price; for just £20, the Jumbo Tong is amazingly affordable and is the perfect companion for voluminous, natural looking movement.  You can find them on the Toni & Guy website here and also in lots of high-street stores.

Have you tried the Toni & Guy Jumbo Tong?  Which 'Hair Personality' do you reckon you'd be?

Thursday, 19 September 2013

Enrapture Totem Styler | My Wavy Hair

Enrapture Totem Styler | £59.99* (Currently on offer for £39.99 at Boots - Link)

One of the most common questions to hit my inbox or comment box revolves around how I style my hair.  Although it's almost always wavy or curled in some way, my hair is actually pretty straight naturally and I've tried all kinds of hot tools and products over the years trying to achieve my desired look.  I love having wavy hair - it's so versatile and doesn't take a great deal of time to achieve once you've got the hang of it. If you wash your hair every other day like me, then it's a good way of keeping it from looking lifeless between washes - you'll often find that once slept on, second-day waves actually require no styling at all - great for when you need to get to work sharpish!  The Enrapture Totem styler is my new addition to my styling tools collection.  It's definitely not your average curling iron - in fact,  it's much more swish... Let me explain why!

The Enrapture Totem styler allows you to fully control the curls you create - from soft, beachy waves to perfected ringlets. Gone are the days where you need to hoard a vast array of different contraptions for different styles -  the Totem Styler allows you to create all kinds of looks with ease.  The wand allows you to control the amount of heat emitted by the barrel at different 'points' using a simple numbered dial - meaning that you can control whether or not you want a tighter curl at the root, or a looser, more voluminous look from root to tip.  For the look shown above, I used the setting '1-2-2', meaning that the curl would be looser at the root, and more defined towards the mid-lengths and bottom layers of my hair.  This is the look I usually opt for - I'm not a big fan of full-on ringlets and like it to look as natural as possible.  I've since played around with the settings a little more, and I find that a '2-2-2' setting (an even, medium heat) creates a similar look but with more definition around the top sections of hair - these 2 settings have become my 'go-to' for creating my hairstyle. A quick spritz of hairspray and I'm good to go.

Since using the Totem Styler, I have noticed a big difference in the way my hair looks after styling.  The titanium plated barrel prevents snagging and help keep your hair smooth and frizz-free.  My hair always feels sleek afterwards and the curls are always beautifully defined, without any frizzy, coarse bits that other wands can tend to leave if you aren't careful.  The Enrapture Heated Rollers are actually another one of my favourite hair tools to use (you can read my review here if you're interested!) and I've found that they provide a similar look and feel to the hair - Enrapture products really do give a perfected finish that I haven't found with other hair tools - they leave your curls looking sleek and soft and perfectly natural rather than over styled. 

I really do love the Totem Styler and I adore Enrapture as a brand.  I still think my  trusty heated rollers have the edge sliiiightly, but I often use the two tools together - touching up little bits with the Totem once I've volumised using the rollers.  Together they have become my little dream team for wavy hair and I honestly couldn't live without them.  They give such a unique look that I haven't been able to achieve with other tools.  Are they worth the money? Absolutely, yes. If I woke up tomorrow and found that they had tottled off somewhere I'd repurchase them without a second thought. Even if you're a beginner when it comes to styling, each product comes with it's own instruction booklet with step-by-step instructions of how to create different looks (they also have videos on the website - so handy!).  Although I was sent the Totem to review, I loved the brand even before I got my mitts on it.  My Heated Rollers were actually a Christmas gift from my mum, and I loved them straight from the first use - my experience with Enrapture has been excellent and if you're looking for a new styling tool, I'd really recommend you take a look at what they have to offer.  They take a little more practice than other tools (it took me a couple of trys before I managed to get a hang of the Totem properly!) but once you've got the 'knack', you'll never go back ;)

You can find the Enrapture website here.
Or take a peek on Boots website (they're on offer for £39.99!)

Fancy having a look at how my hair looks when I've used the rollers? Have a read of my post here!

Have you tried the Totem Styler? How do you like to style your waves?

Sunday, 24 March 2013

Enrapture Extremity Heated Rollers | A Review

Enrapture Extremity Heated Rollers | £59.99 - Boots | For stockists see here |

Before Christmas, I spent a great deal of time researching the Enrapture Extremity Heated Rollers but never quite took the plunge with them.  I've always loved big, bouncy hair but the furthest I'd ever ventured into the whole world of hair rollers and such-like was a pack of yer' average velcro ones from Boots. So, imagine how happy I was on Christmas morning when I discovered that Santa had very kindly treated me to these beauties. After using them a great deal over the past 3 months, I thought it was about time I give you all a run-down of my new favourites.. Apologies if this review is a little lengthy - but I've split the review into sections so you can pick and choose as you please depending on what you want to know..


Set Contents & Packaging
The packaging is the first thing that struck me with these rollers.. Call me a marketer's dream but the purple irridescent-y box just screams luxury (not pictured but trust me on this one, it's mesmerising!) In the box, you get a little leaflet which outlines how best to use the rollers depending on what you're after - volume, or curls, or even both. The set contains 10 large rollers, and 10 smaller 'medium' rollers - all with their own butterfly clip used to secure them onto your barnet. I have fairly long, thick hair and this amount is more than enough for me; I often have a couple of each left over once I've covered my whole head.


So how do the rollers work?
Enrapture rollers emit their heat from the core. As you can see from the photographs above, the rollers 'sit' on little bands of heated strips, which heat the roller from the inside. Once on your head, they emit heat from the core. The little butterfly clips also have a small metal plate on them, meaning your hair wrapped around the roller is surrounded with an even amount of heat - locking the style into your hair as the roller and clip heat up simultaneously. They don't take long to warm up at all - it takes all of 2 minutes, if that, for the little LED panel on the front to show that they're ready to use. Fear not, the rollers will not burn your hands - they slowly emit heat and even when on your head, they don't feel uncomfortably hot. I must admit it's lovely and toasty on these cold snowy mornings!

How I use the rollers
It took a little getting used to at first. I recommend trying them on a day where you have time to experiment as I found I had to work out my own little 'routine' with the rollers before I had it completely mastered.  The 10 larger rollers are meant for volume, and bouncy waves, so I tend to place these around my roots and the top sections of my hair. The smaller medium rollers are used for more defined curls, and I place these towards the bottom layers as this is where I like my curls to stay tighter. The velvet on the outside of the rollers helps to keep the hair in place, whilst avoiding snagging or breakage. I find it best to begin in the middle of the strand of hair, wrapping the ends around before rolling the roller up to the root. Using them in the same way as velcro rollers is very fiddly indeed - but once you've got the 'knack' it's superly-duperly easy peasy and you'll be able to do it with your peepers closed. 

I usually pop them in before I do my make-up of a morning, just to get the most out of the setting time.  If you're in a rush then you're fine to take them out after 20 minutes or so, but I leave them as long as I possibly can. If I'm going out for the night then I'll pop them in for a good hour or so whilst I'm eating my dinner! They sit very comfortably on the head and don't feel too weighty - I find the warmth very relaxing! I take strands no smaller than an inch or so and vary the sizes slightly to give a more natural look, and spray them lightly with a heat protectant and a quick spritz of Elnett hairspray before rolling the hair into the roller. The moisture helps to create the curl and 'set' the style a little more. When I take them out, I simply spray each curl lightly with the hairspray again, before general 'tousling' to make the waves look more natural. 

Finishing Touches
The hairstyle shown above was created using purely the heated rollers. You can see the volume and root lift it creates along with the smoothness of the curl.  One thing I find through curling my hair with straighteners and other appliances, is that my hair can feel a little dry - these rollers help to keep your hair soft, smooth and touchable and look effortlessly natural.  I do find some sections can drop slightly, but setting with hairspray really helps keep them in for longer. If I accidentally leave any ends or small pieces of hair out of the roller (as you can see in the photograph above), I just tidy them up by curling them with the straighteners to blend in - it's such a quick and easy way of styling. Definitely a lazy-girl's go-to method for wavy-princess hair!

Are they worth it?
I adore these rollers so much and have been so impressed with them. They really are worth every penny (can you gather how much I love them yet?.. I sound like a broken record!). I love the fact you can alter the style you wish to go for depending on the size of the rollers you use - making them so versatile for day or night.  I love popping them in, doing my make-up for the day and not having to worry about spending ages on styling my hair, as as soon as I take them out the rollers have already done the work for me. All that's left to do is general finishing and touching up.  You do need to find a good hairspray to use - as on days where there's a bit of moisture in the air (typical English silly weather) I tend to find they drop a little bit quicker.  Overall, they are a staple in my hair routine that I genuinely couldn't live without now - they have changed my perception of rollers and give my hair that extra 'oomph' that I haven't been able to achieve before.  All of you fellow big hair fanatics - I urge you to give these a whirl! You can find them on their website here.

Have you tried Enrapture Heated Rollers or other Enrapture hair tools? What were your thoughts?


Monday, 31 December 2012

How To: My Everyday Hairstyle | Casual Waves

Products used / Loreal Elnett Heat Protecting Styling Spray in 'Curls' / Tresemme Keratin Smooth Protecting Spray / John Frieda Frizz Ease Shape & Shine Hairspray / Loreal Elnett Volume Hairspray / Batiste Blonde Dry Shampoo / Tigi Bed Head Dumb Blonde Smoothing Stuff / Schwarzkopf Got2B Powder'ful Voumising Styling Powder

Firstly, apologies about the lack of my face in this post.. I do hope you can forgive me. I'd got up early, hadn't applied a great deal of eye-makeup and didn't feel at all spritely this morning to say the least. Nevertheless, because I love you all so much, I thought I would take the chance to take a few photos of my daily hair routine since I had some spare time on my hands. Quite a lot of you asked me about my hairstyle in my Christmas Face of the Day post (here) and so I thought I'd give you a little run through of how I achieved it and the products I use to style my hair everyday. This has been one of my 'signature' styles since I was at school - and I find making my hair wavy this way is very quick if you're in a rush, or are just lounging around the house but want your hair to look half-decent. The beauty about it is that it turns out slightly different every time you do it, and the longer you spend on it the more control you have over what it turns out like. Personally, I like my hair to look a little 'undone' and a little dishevelled, so if i'm being completely honest I don't often take too much time or care in doing it! It's a very versatile little method and one that I will continue to use until i'm old and grey and resisting temptation to get a perm...

Step 1 | This step is optional, but being a massive fan of volume I take my teasing comb and backcomb at the roots lightly. My hair often gets quite dull in the winter months so I also tend to spray some Batiste dry shampoo in 'Blonde' at the roots to lift the colour slightly. This is also a fabulous way to add texture to 'just washed' hair - it takes away the fly-away feeling and helps to achieve volume. I just generally give my hair a bit of a tousle and a fluff up to prep for the further steps.. (you may notice one side of my hair is already curly - I decided half way through my hair-routine to start this tutorial so concentrate on my other half of my head)

Step 2 | To make my hair wavy, I use my trusty Remington straighteners. Yes, you may gasp in horror that I don't use GHD's but my trusty age-old ceramic Remingtons do the job perfectly fine (and until they run out of juice i refuse to throw money at more heat appliances as I have a drawer full of them - eek!). I either use the Elnett Styling Spray or the Tresemme Keratin Smooth for my heat protectant. For daily use I find the Tresemme works wonders on my hair as it keeps it soft and manageable and doesn't weigh it down. If I need my style to last for a night out I will use the Elnett Styling Spray. This is a little heavier and feels a bit more like a hairspray when applied - it has a slight sticky feel to it that helps to keep the style in your hair for longer.

I take 1-2 inch sections, varying as I go around my head but I never go smaller than this. The bigger the sections the looser the curl. This step is a little difficult to explain (definitely need to start YouTube!) but I place the straightener where I want the wave to begin - usually about 3 inches down from the root. After this you need to move fairly swiftly to avoid lines in the hair. I turn the straightener as shown so that the hair is wrapped around the 'barrel' bit. I turn it just under 180degrees (the further you twist the straightener the tighter the curl).

Step 3 | I then move the straightener down to the ends of my hair as smoothly as I can. If you aren't used to curling your hair with straighteners then I will warn you this bit takes a bit of getting used to (especially if yours are square edged like mine - but don't worry if they are, you can't tell at all if you do it correctly). I repeat the process all around my head - I dont section it off - I just do as I please as it adds to the 'undone' look I'm going for. But I do concentrate more on the two front sections.

Step 4 | I then take John Frieda's Frizz Ease Hairspray. If you're after a really good setting spray then this is wonderful. You don't need much at all. I spray 2-3 sprays on each side and lightly tousle the waves I've made. I don't scrunch it! This will make it frizzy and ruins the smooth shape you've created.

Step 5 | Again this step is optional. I don't always do this but I find it helps if I'm having a flat hair day. I take Schwarzkopf's Volumising Powder and use a small bit rubbed into the palm of my hands to lightly mess up the lengths. This adds volume to the lengths of the hair - if your hair is like mine and all the layers have grown out (my hair is mostly one length), it can be difficult to achieve volume - especially if it's long as it weighs the curls down. This gives the style texture and plumps up the hair. Again, I do this lightly and use more of a 'lifting' motion as opposed to scrunching the hair.

Step 6 | After all of that styling and 'plumping' sometimes some hairs can get out of place and if I'm having a bad hair day it can sometimes look a little frizzy (damn you, wintery weather!) If this is the case I take a pea sized amount of Tigi's Dumb Blonde Smoothing Stuff and very lightly smooth down the frizzy bits. I do this bit so lightly that I almost don't touch the majority of my hair - just the flyaways!

Step 7 | This step is just general shifting and perfecting. I use my fingers for this. I pull my fringe down properly and lift up the roots to bring back the volume I added at the start of the process. I sometimes give it a quick once over with Elnett's hairspray - it's really light and just seals in the style without making it crispy and overdone.


It goes without saying I use volumising shampoos and mousses when I blow-dry my hair (John Frieda's Volume Shampoo and Mark Hill's VaVaVoom Mousse to be precise) so I give my hair as much help as I can to achieve the volume. And there we have it! Simples! If I ever start YouTube I shall definitely do a little tutorial on this in video form. I'm also planning on doing some more in-depth photograph tutorials on my blog over the next few months using my waving wand (my favourite for nights out) and various curling tongs - I often switch up the heated appliance I use and each provide slightly different looks. So keep your eyes peeled for those!

What is your everyday hairstyle?