LinkWithin

Related Posts Plugin for WordPress, Blogger...
Showing posts with label FOTD. Show all posts

Thursday, 21 November 2013

Nars Sheer Glow Foundation | Full Review & Swatches

Swatches / L - 'Fiji' | R - 'Punjab'

Nars Sheer Glow foundation has fast become one of the most talked about 'high end' foundations amongst bloggers and beauty fans of late.  I think I'll just take this moment to commend myself at how long I managed to refrain from purchasing (pat on the back, Beth) - I certainly didn't take the decision to part with £30.50 lightly! I spent hours scouring the interwebs for reviews, shade descriptions and good and bad opinions until I eventually decided to just bite the bullet and go and get myself matched.  I shall apologise now - this post isn't going to be the snappiest review in the world but I wanted to provide a more in depth product overview and list all the vital information I personally wanted to know before I purchased.  However, I shall waste no time in telling you that it is without a doubt one of the best foundations I have ever bought - I genuinely do love Sheer Glow - but I did have to give it a second chance.  Let me explain...

I actually had a sample pot of this a good few months back.  I had amazingly sky-high hopes for it after reading many a rave review but was left feeling a little bit 'befuzzled' (is that even a word? It is now...) It looked awful on me - I immediately took it off with a face wipe and reapplied my trusty YSL Touche Eclat - I forgot about it and that was that. Skip forward a few months and I'd read an influx of amazing blog reviews that had left me wondering 'what am I missing out on?' - maybe I'd just applied it on a bad day? I had my graduation coming up, was obviously going to be having professional photographs taken and I wanted a long lasting, flawless effect foundation with no SPF (Nars Sheer Glow doesn't contain any at all).  I spent about 3 or 4 weeks thoroughly researching everything (detective Beth) and decided it was time to give it another go. First impressions aren't always right, after all.  I tottled into Space NK, was matched up to 'Light 5 - Fiji' (which I'd already picked out from online swatches, how's that for research?!) and left feeling completely content with my purchase.  I applied it as soon as I got home and was amazed at the results.  It looked flawless! Far better than it did previously when I'd tried it - almost like a completely different foundation! It didn't look cakey or dry or orange in any way - it appeared just like my skin - but better! I have no idea why it didn't mesh well with my skin from the sample pot - my only explanation was that it has dried up slightly as there wasn't much in there and I didn't get a true representation of what Nars Sheer Glow had to offer.

I used it more or less every day up until my graduation, so that I could get used to applying it the best way and learn which moisturiser worked more effectively underneath it.  One of the things I really have to highlight about Sheer Glow is that it is by no means a dewy foundation as the name would suggest.  It's actually got more of a satin, almost matte finish which provides a slight hint of a 'glow' to the skin so it still appears natural and maintains a bit of dimension.  It definitely has that 'lit from within; look.  However, it will cling to the slighest dry patch you have without fail. I have combination skin so have to make sure I really do exfoliate regularly and use a rich moisturiser on my forehead and outer cheeks (my dry areas) before application to ensure this doesn't happen.  Application is a dream - I actually find it best to use my Real Techniques Buffing brush to buff and smooth it onto the skin, and it instantly smooths out any uneven pigmentation, red areas or blemishes.  It provides the effect of a medium-full coverage but without the whole 'heavy sticky' sort of feel.  Wear time is amazing - I can get a full day at uni out of this with little need to touch-up with powder or concealer throughout the day and sometimes I can get away without powdering at all.  It also photographs beautifully - not a hint of flashback or 'oilyness' and for the first time ever I had no hint of 'ghost face' in my photos whatsoever.  Thumbs up for not looking like Caspar!

Like most people mention, the only slight downside is the fact that it doesn't come with a pump. The glass bottle and sleek Nars packaging are undeniably beautiful but it can get a little messy quite quickly if you're the clumsy type and it's easy to pour out too much - which is why I went on Space NK's waiting list for a Nars Foundation Pump (yep, that's right, waiting list!!) It cost £4 and came packaged in its own little Nars box (which actually made me quite happy - how cute does the little box look?!) and does the job perfectly well. The only problem is, once you apply the pump to the bottle, it makes popping the lid on impossible so if you're the type to carry your foundation around with you, I'd suggest just doing without it unless you fancy seeing the contents of your bag swimming in foundation.  Slight negative aside, I really do love this foundation.  Fiji is just the perfect shade for me and it's yellow undertones match my skin amazingly well (worth mentioning that Nars foundations are predominently yellow based) - in fact, I have to admit it's probably the best match I've ever found in a foundation.  You may be wondering then, why I have two bottles? Simple answer - Punjab suits me better if I have a little bit of fake tan on.  There's actually not a lot of difference between the two but it's a tad darker and ever so slightly peachier - worth baring in mind if you have the same skintone as me but wear fake tan on a regular basis.  I personally don't wear much on my face through winter unless I'm going out so for now, Fiji is my 'everyday' shade and 'Punjab' is purely a 'night on the tiles' shade,  To say I've swiftly gone out and bought another shade speaks volumes for my love for Sheer Glow!  Whatever your skintone, you're bound to find the right one for you - there's 20 shades (I believe?) ranging from pale to dark and everything inbetween. Maybe one of the best colour ranges I've seen. It's also worth mentioning that I usually HATE medium/fuller coverage foundations, but this one has changed my opinion and swayed me.  It has that flawless effect without feeling like it's clogging up your pores and it looks lovely and natural - no cake face in sight. It's actually one of the only foundations I've tried that seems to mimic the texture of skin.

I thought I'd sum it up for you if you're considering buying the infamous Sheer Glow but didn't fancy reading all of my dribble...

The Stats:
My Shade: Light 5 'Fiji' (every day) / Medium 1 'Punjab' (with a touch of fake tan)
Fiji = Light with yellow undertone | Punjab = Medium with golden, peachy undertones
Cost: £30.50
Coverage: Medium to full (in my opinion)
Finish: Satin - naturally radiant
I apply with: Real Techniques Buffing Brush

Pros: 
- Even, flawless coverage
- No SPF was a 'pro' for me as it's great for flash photography - a great 'going out' foundation - no flashback.
- Provides a slight glow/sheen to the skin without looking oily or greasy
- Works well with my combination skin
- Covers up my blemishes with ease
- Only 2 pumps needed for the entire face - it will last a good while!
- Fabulous shade range
- Lasts all day.
- The glass bottle and Nars packaging pleases me. 
- Doesn't seem to oxidise on me
- Predominently yellow toned range suits my skin  (personal 'pro point' - if I was any more yellow I'd be a Simpson!)

Cons:
-Can cling to dry patches. If you have dry skin or any dry patches whatsoever - take heed! If you've forgotten to moisturise it will look awful! Prepare for a love/hate relationship at first until you find your 'routine' with it.
- No pump 
- Some would say price - but I think it's worth the money.  
- If you live in sunnier climes (lucky you) bare in mind that the lack of SPF might not be the best choice for daytime wear.


Overall - I love it.  I'm so glad I gave it a second chance and didn't settle for my opinion on the tester pot.  It gives a naturally radiant finish that looks like skin and feels lightweight, at the same time as giving a brightening effect - perfect if I'm feeling a little tired and worse for wear!  I've had so many comments on my skin since wearing this - and it gives me a little boost of a morning.  I just look forward to applying it and for me, that's what makes a great foundation. Nars Sheer Glow? I COULD KISS YOU! You can find the range on their website here complete with shade descriptions, and it is also available at Space NK, ASOS and John Lewis - to name a few!

Have you tried Sheer Glow? What were your thoughts?

Sunday, 1 September 2013

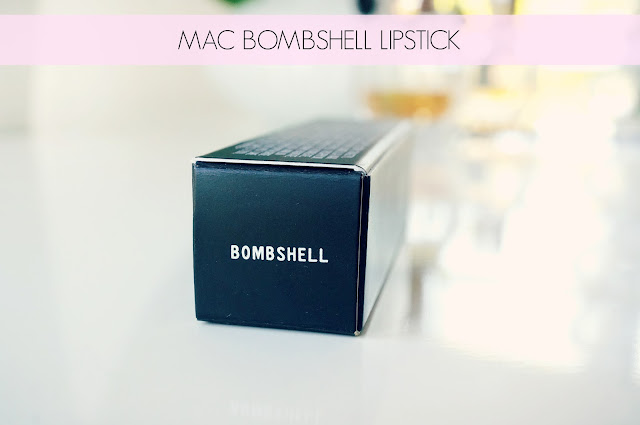
Mac Bombshell Lipstick | (& a little FOTD)

Products used | Mac 'Bombshell' lipstick | Mac 'Harmony' blush | YSL Touche Eclat foundation in 'B40' | Bourjois Bronzing Primer | Art Deco Eye Kohl in Black | Urban Decay Naked2 Palette - shades 'Tease' (lid and lower lash line) and 'SnakeBite' (crease) | Nars Multiple in 'Copacobana | Ardell Demi Wispies | HD Brows in 'Bombshell' |

For ages now, I've been lusting after Mac's 'Bombshell' lipstick - a mid-toned pink shade with subtle flecks of shimmer. But since my collection seems to have bred somewhat the past few months, I thought I'd be sensible and walk on by. After all, I didn't need another pink lipstick, did I? Well, it turns out that I did...  Sensibility goes out the window when you're a lipstick-aholic! My intentions were good, honestly, they were - but I reach for lipsticks of the pink variety one heck of a lot, and this one really is a lovely everyday shade that I know I will get tonnes of wear out of.

Bombshell is a frost finish lipstick from Mac - not the most popular of formulas, I know, but I must admit I quite like the finish they give and certain shades don't appear as 'frosty' as others.  Think 'Costa Chic' (one of my all time favourites) - it only has a little hint of shimmer and is incredibly pigmented - exactly like Bombshell. If you get put off with the frost finishes from Mac and don't usually give them the time of day - I really recommend you swatch a couple of them - they all differ slightly. Bombshell is fairly neutral in undertone, but leans slightly cooler on me.  I think it's one of those shades that looks different on people depending on their skin and hair colour - I've seen this on someone with a darker skintone than me and it looked almost coral. It's a shade that would suit a majority of skin tones, and would look stunning with a deep, golden tan.  I would liken the shade to a cross between Mac's 'Angel' and 'Speed Dial' - it's definitely a bit of a hybrid of the two (with a pinch of added shimmer) and if you're usually slightly scared off by bright, barbie pinks, then 'Bombshell' might just be the one for you.  It's noticeable enough to be a step up from a 'pinky nude', but without looking false or too bright.   

Here, I've worn 'Bombshell' with a taupe smokey eye and understated blush, (I've listed the key products I used for this look at the top of the post) - it's the type of colour that will look lovely both in the day or for a night out and I will definitely be throwing it in my handbag for uni next month. It is such a gorgeous shade and it looks stunning applied with simple, neutral makeup for a pop of colour without being too 'OTT'.  As for wear time, it lasts for a fair few hours on me, but I always top up reguarly anyway so it looks 'fresh' (I do this with all my lipsticks...creature of habit!).  The only thing with frosts is that they have a tendancy to settle into lines on your lips - so it's worth applying a lip balm beforehand if you want to give this a whirl.  Saying that, the formula isn't at all drying and glides on so smoothly and evenly - it feels very light with a hint of moisture, and keeps it's sheen for a good while before wearing off to a subtle wash of colour.  Overall, I love this new addition to my Mac-stash and I'm glad I gave in to temptation on this occasion.  I love it to bits - and it's definitely an underrated shade in the blogging world! 

Have you tried Mac 'Bombshell'?

Tuesday, 12 March 2013

How I Contour | Feat. Chanel Bronze Universal & Swatches

Chanel | Soleil Tan De Chanel - 'Bronze Universal' - £31 | Link

It was an exciting day when I first purchased Chanel's ever so famous 'Bronze Universal' let me tell you! I took it home, placed it delicately on my bathroom counter and cherished its very existence in my makeup collection, but there was one problem - I was at a complete loss of how best to use it. I googled it, I tweeted about it, and I googled it some more - but each time I'd receive a multitude of different answers of how best to apply it. The lady at the Chanel counter suggested I used a flat foundation brush to work it into the skin for contouring - and for a while that was the method I used. Although it worked, the method just didn't float my boat - it may have been the brush I was using but I felt as if I needed to test a slightly different approach. So, I took it upon myself to test and try all kinds of different ways of working with it until I settled upon one that worked for me and one that provided me with the best results. Mission accomplished. 

As some of you may know, I'm a massive fan of contouring. I naturally have quite defined cheekbones and they're something I like to accentuate more when I can - simply because they give my face definition and shape and they're a feature I feel I need to make the best of! I've been contouring for a few years now - ever since I first learnt 'the secret' (ooo 'the secret'..) of how to make your face appear more sculpted - my makeup collection is full of all sorts of highlighters, base products and sculpting essentials. Chanel's Bronze Universal provides the most natural looking 'skin-like' finish and works very well with my skin tone. Here's my step by step for my current contouring routine I use for my cheekbones..

1. Apply your base | I use Yves Saint Laurent's 'Touche Eclat' foundation in 'B40' and buff this into the skin using my Real Techniques Buffing Brush.  This is the only brush I find works with this foundation and together they are an absolute cosmetic dream team! This stage provides a flawless looking 'blank canvas' ready for sculpting (I apply a primer beforehand too - just to make sure my makeup is being applied on a clean, smooth base).

2 & 3. Chanel Bronze Universal | If you're unsure how or where to place the line of contour, a good way to find your natural cheekbone 'shape' is to simply pull a fish face. Not at all attractive but suck in your cheeks for a second and you'll notice where your natural line is (google this method if you're unsure!) You can see where I've placed my line of contour - I always begin near my hairline and apply most of the product here, as this is where I want my contour to be strongest and where there is naturally more shadow on the face. I then take the product down near to wear my inner cheek is - making sure that the line there is slightly thinner than it is near to my hairline. 

I do this using my fingers or a flat foundation brush - but if I'm honest I find using my fingers to apply this works better than a brush - as the product is warmed up and can be moulded into the skin more (of course if you're going to do it this way then it goes without saying to make sure you're hands are squeaky clean before doing this step..)

4. Buffing using Real Techniques Buffing Brush | Buff the line you have just made into the skin using a buffing brush - making sure the movements you use are along the same 'line'. You don't want to be swirling the brush all over your cheeks as this will ruin the whole effect!

5. Mac Mineralise Skinfinsh Natural in 'Medium' | I then apply my Mac MSF using my Real Techinques powder brush. This sets the base I have just applied.  As a general rule, any 'wet' product you apply to your face should be applied before your powder - and any powder products applied afterwards. You know it makes sense... ;)

6. Optional Step - Sleek Contour Kit in 'Light' | Sometimes, the contour I created with the Chanel is enough for me. On other occasions, I want a little bit more 'oomph' (nights out for example) - this is when I apply the matte bronzing powder from this palette. I use my Real Techniques Contouring brush to do this as i find it works well with my powder products, and simply go over the line I've just created, being careful to blend it in properly. It can sometimes look a little 'muddy' if you over apply so paler skin tones - take heed! I then apply the highlighting powder across the top of my cheekbones (just underneath the eye area) and sweep this up to my hairline. 

7. Blush | I apply my blush of choice on the apples of my cheeks and take it up slightly near my hairline - this way I have the highlight, blush and contour all merged together and running the same way.  I used Benefit's Coralista blush in this example - if you're wondering!

8. Contouring complete! If you're still unsure, it helps to look at your face from different angles in a mirror and realise where light naturally hits, and where shadow naturally falls (looking up into a mirror highlights the lighter areas, and vice versa). I then usually take my contouring underneath my jawline and onto my forehead using the same method (again, google this as there's tonnes of images of where to place contour & highlight - it's generally made in a '3' shape around the side of the face)


The way you work with this product depends on what kind of look you want to go for. A flat kabuki brush will work wonders for an all over bronzing base, but when it comes to contouring, the softness of the line you use is key to creating a natural looking, flawless finish. The texture of the Bronze Universal is very blendable - almost like a hybrid of a mousse and a cream. It's also very buildable and is a product that can be used in a multitude of ways. This is just how I contour my cheekbones - you might find another way works better for you but this gets the best results for me personally! Kim Kardashian - eat yer heart out, petal!

Here's a rundown of products used in this post:


YSL Touche Eclat foundation in 'B40' (review here)
Chanel 'Bronze Universal' (first impressions post here)
Real Techniques brushes - Buffing, Contour, Powder, Blush (collection post/review here)
Mac Mineralise Skinfinish Natural in 'Medium'
Benefit Coralista blush (review here)
Sleek Contour Kit in 'Light'
Benefit 'They're Real' mascara (review here)
Sleek Eyebrow kit in 'Light'
HD Brows palette in 'Bombshell'
Mac Smolder eye kohl
Mac 'Plink!' lipstick.

I also used this method of contouring in my FOTD post here - which was used for a night out! You can see the definition and line of contour more clearly!

Have you tried Chanel's Bronze Universal? Are you a fan of contouring like me?

Sunday, 10 February 2013

Kate Moss | The Infamous '107' Lipstick

Rimmel Lasting Finish Matte Lipstick by Kate Moss - £5.49

Kate Moss for Rimmel lipsticks have been huge in the blogging world the past couple of months or so, and I was lucky enough to win one in the lovely Sophia's giveaway (you can find her fabulous blog here) before Christmas - the perfect time to experiment with wine and berry colours on the lips.  The shade '107' has been a sell out in most Boots stores, and is has proven rather difficult to find online just recently too, so I was excited to discover what all of the hype has been about and felt rather lucky indeed to add this little beauty in my collection.

Matte lipsticks don't usually float my boat, if I'm honest. I don't have particularly dry lips but I struggle to find a suitable one because I'm so fussy about how they feel and I usually opt for a 'buttery' finish. This is just not the case with this lipstick - it's just spot on for a matte finish and one that is so unbelievably wearable. It doesn't feel drying, it doesn't drag when applied and it has a velvety feel to it that just makes it an absolute dream to wear. So much so, I cannot wait to head out to Boots and grab myself a few more shades from the range. It even smells beautiful - almost like watermelons.. which is a lovely fruity bonus if I don't say so myself!

I've used a Barry M lip liner to get the defined look in the photographs above, but to be honest you could probably get away without using one if you're very careful with application (i have a post on the lipliners here).  It smooths on effortlessly and just one coat provides opaque colour - It really defines the lips and creates an intense, 'vampy' look that's right on trend for the current season. It definitely glams up my every day makeup and almost makes my lips appear fuller than they are (Angelina Jolie I am not!) Usually with dark colours I find they bleed or smudge off slightly, but this one has impressive staying power. Needless to say, I've fallen in love with this lipstick and I cannot wait to hop in the car and get myself to Boots so I can hunt down some more from the range! If you're like me and tend to be put off with matte finishes, I urge you to give these a whirl.. they might just change your mind.


What's your favourite Kate Moss Rimmel lipstick?
 

Sunday, 6 January 2013

New Year's Eve Makeup | FOTD


Since one of my New Year's blog related resolutions was to upload more 'Face of the Day' posts, I figured I'd include a photograph of my 'NYE makeup' - I'm sorry I didn't manage to get any close-ups or further photographs - I'm waiting on my macro lens for my new camera so make-up photos will be a doddle and I'll be able to capture more detail... & also I was in a bit of a rush to pick my friend up! Excuses aside,  New Years Eve calls for a bit of glamour when it comes to hair and make-up, and I opted for smokey eyes, a mild orange/peach lip, and side swept hair. I love wearing blue, and always seem to pair it with an orange shade on my lips - it creates such a lovely colourful contrast. I also went for a stronger contour on my cheeks than I usually wear in the day, and just generally dramatised my everyday makeup and made it more night appropriate..

Topshop's Charmed is a beautiful shade of peachy orange, and is bright enough to make a statement but not so bright you can't get away with it in the daytime.  I applied it lightly and smudged it with my fingers to get more of a softer look, and applied a nude gloss over the top to tone it down. I bought this shade way back when it was part of a limited edition collection, but I've seen it in my local store just recently so I'm pretty sure it's now part of the permanent collection.

| Face |


YSL | Touche Eclat Foundation in 'B40' (review here)
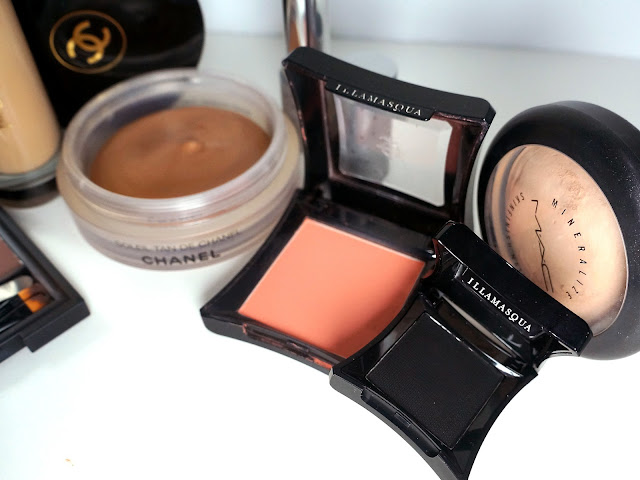
Chanel | Soleil Tan De Chanel (contour) 
Mac | Mineralise Skinfinsh Natural in 'Medium'
Illamasqua | Powder blush in 'Lover'
Nars | Albatross Highligher
Nars | Laguna Bronzer
Sleek | Eyebrow Kit in 'Dark' with Mac | 'Beguiled' brow set

| Eyes |

Illamasqua | 'Obisidian' eyeshadow smoked out from lash line
Urban Decay | 'Bootcall' (Naked2) in corners
Loreal | Superliner Carbon Gloss
Maybelline | The Falsies Mascara
Eyelure | Cheryl 'Girls Aloud' False Eyelashes

| Lips |

Topshop
| Lipstick in 'Charmed'
Barry M | Gloss in 'Toffee'

Dress - Motel via Topshop